《生化奇兵2》语音日志图文指南(英文版)
ADONIS LUXURY RESORT
Audio Diary #1 – “Attention Workers!”
Located in the large pool room where you first see a Big Sister. On the left side of the room, right next to the sparking generator that you use to restore power.
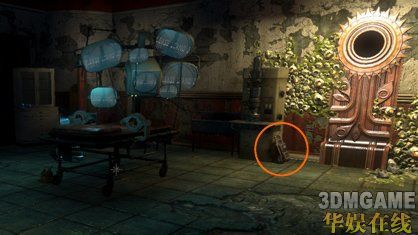
Audio Diary #2 – “Fitness”
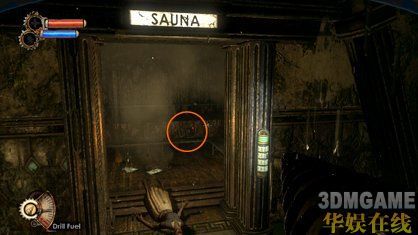
Inside the locked steam room. Just use the code written on the window to enter.
Audio Diary #3 – “To My Daughter”
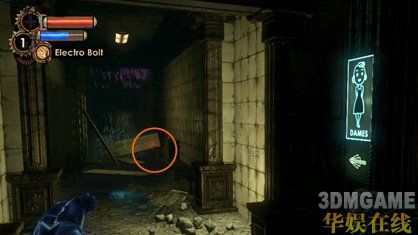
After restoring power and entering the unlocked area, you’ll walk by two restrooms. The audio diary is at the back of the women’s, or “Dames,” room.
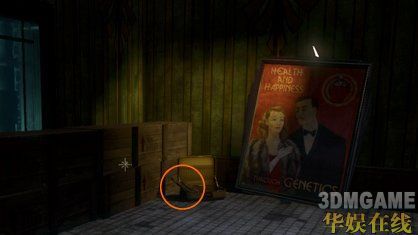
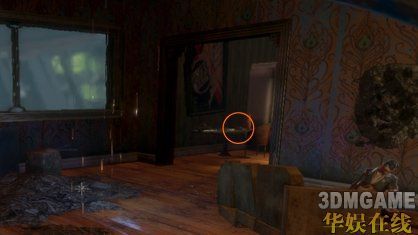
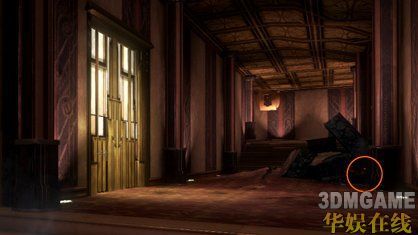
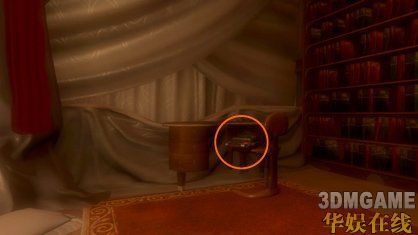
Audio Diary #4 – “Return”
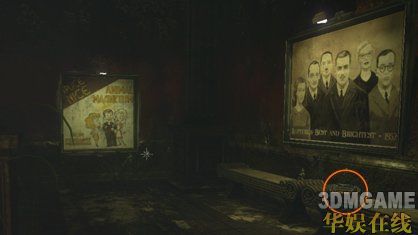
Inside the room with the wading pool and fancy arched bridge. Find the corner with the “Best and Brightest” poster and look on the bench below for the audio diary.
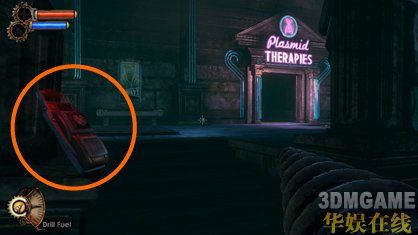
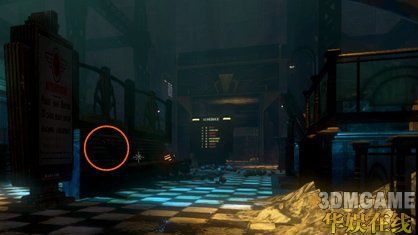
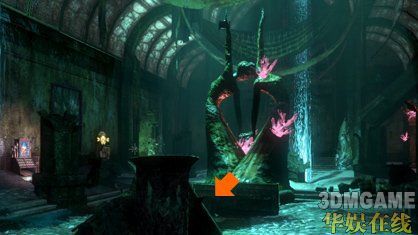
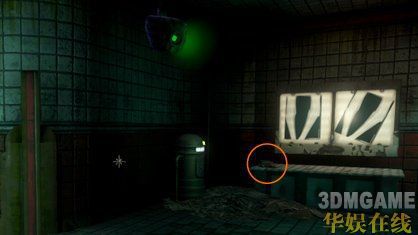
Audio Diary #5 – “They Called It Rapture”
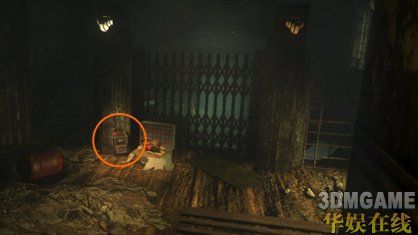
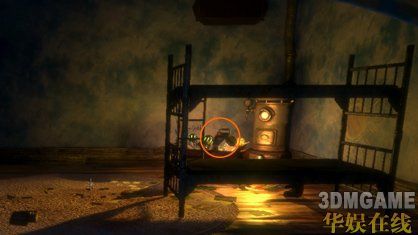
Before moving into the room with the Little Sister, go through the door marked Rapture Metro. The audio diary is on the floor with some teddy bears. The other end of this hallway holds a body with “Stay Away” graffiti scrawled above it.
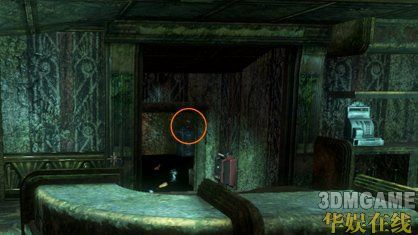
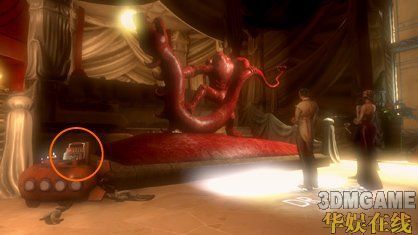
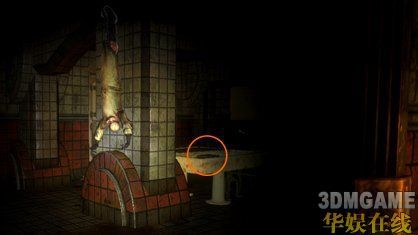
Audio Diary #6 – “Generation”
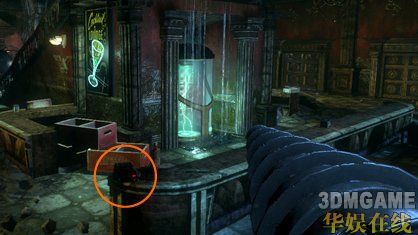
Following the first Big Sister fight in the spacious foyer, check the corner of the bar for this audio diary.
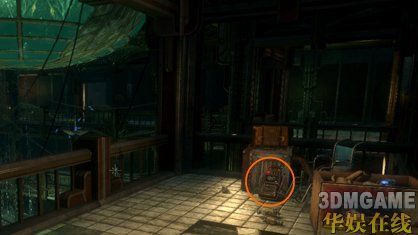
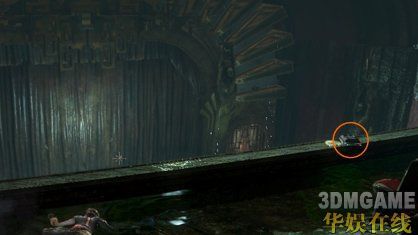
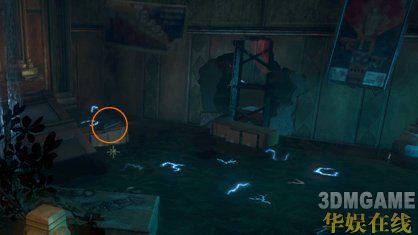
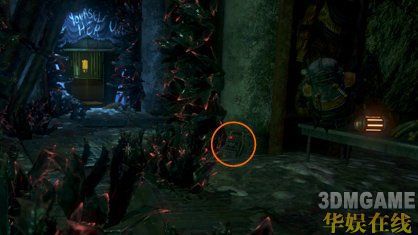
Audio Diary #7 – “Escape from Rapture”
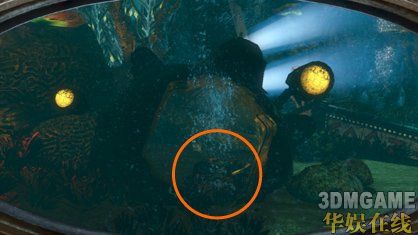
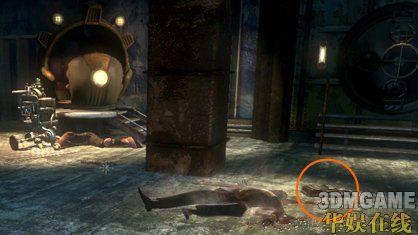
During the first underwater walking segment, watch your left for a crashed bathysphere pod. It’s right before the Adonis pillar forces you to jump. Search the corpses inside to grab the audio diary.
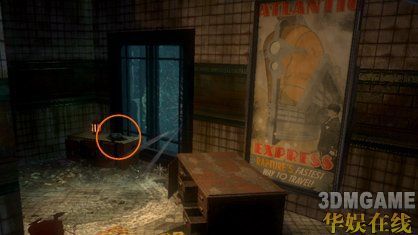
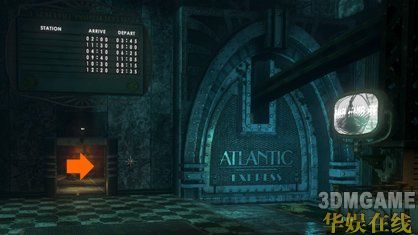
THE ATLANTIC EXPRESS
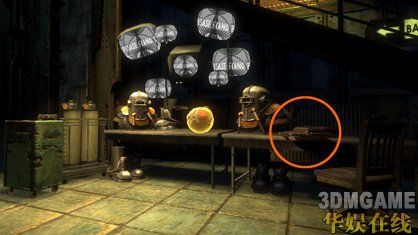
Audio Diary #1 – “The Great Chain Rattles”
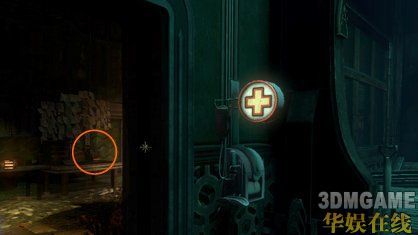
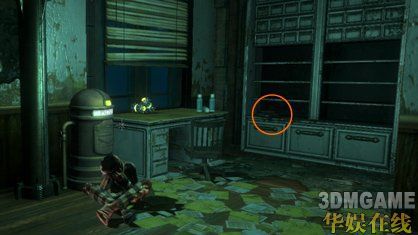
You’ll enter a large station and watch as a train car falls to the ground. To the left of that wreckage is a door leading to a Train Workshop. The audio diary is on a desk inside.
Audio Diary #2 – “Mr. Tape Recorder”
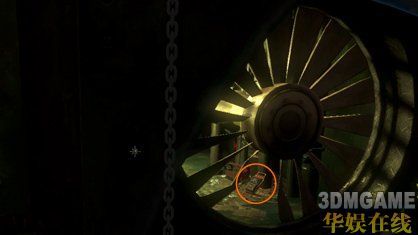
Once you’ve obtained the Telekinesis plasmid, return to the area where you emerged from the water. Next to those steps is a huge fan, with the audio diary hidden behind it. You’ll need to use your newfound power to pull the diary towards you.
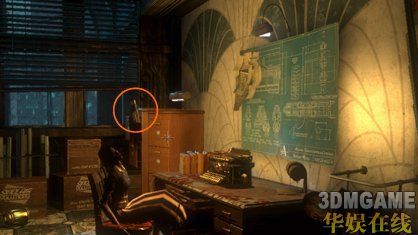
Audio Diary #3 – “Just a Fad”
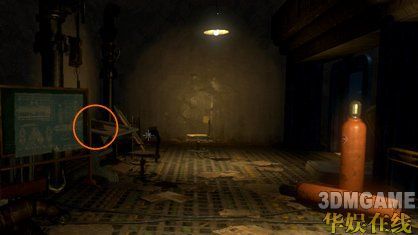
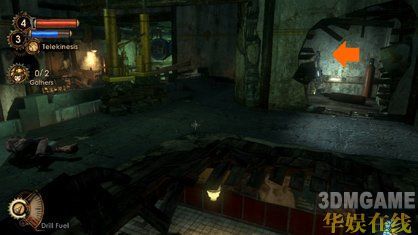
On an upper balcony lined with gas tanks. The game is strongly suggesting that you use your newfound Telekinesis power to throw those tanks at a gathering of Splicers below. Before doing so, grab the audio diary off the drafting desk.
Audio Diary #4 – “What Happened to the People?”
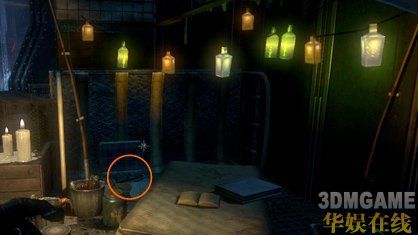
This audio diary is in the second large train station – the one in which the train car doesn’t fall to the ground. To the right of that train car, up some stairs and near a mattress, is the tape.
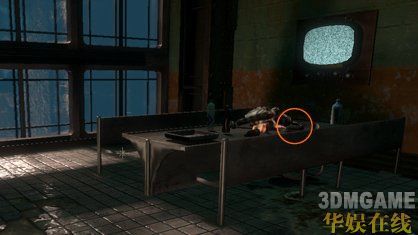
Audio Diary #5 – “Ryan vs Lamb: Reality”
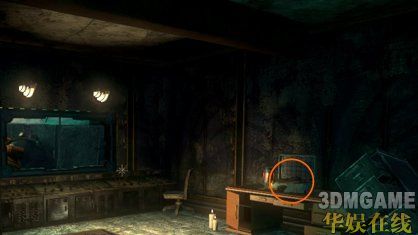
Go to the very back of the cafeteria, past the kitchen with the burning stoves. The audio diary is in a dark storage room with windows looking out on water.
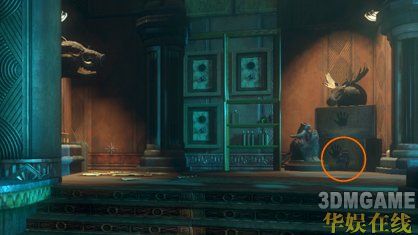
Audio Diary #6 – “Know the Beast”
Once you’ve removed the wrench from the gears using Telekinesis, a big door will open. Go through and turn left, circling through some short hallways back towards the room with the gears. Along that path is the audio diary.
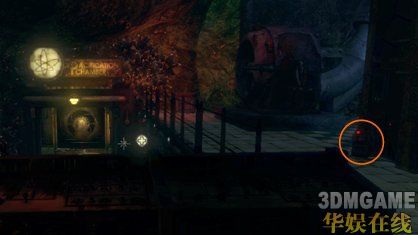
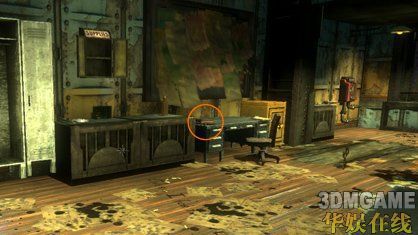
Audio Diary #7 – “Improving on Suchong’s Work”
Upon exiting the lengthy elevator ride, you’ll be in a room with Trap Rivets. Up some stairs and to the left is a Manager’s Office with the audio diary tucked in a filing cabinet.
Audio Diary #8 – “The Situation”
Talk to Tenenbaum, then fight off the Splicer group attack. Before leaving on the train, however, search the benches for an audio diary.
RYAN AMUSEMENTS
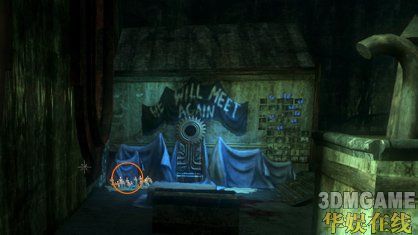
Audio Diary #1 – “Eleanor’s Progress”
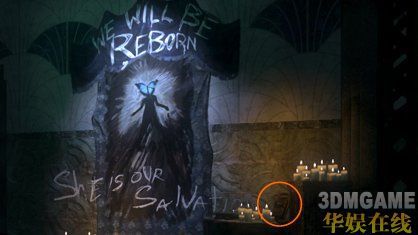
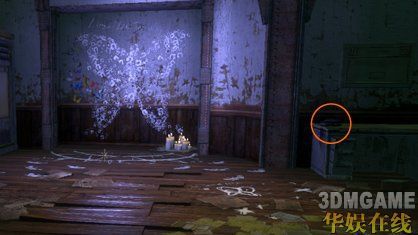
This one’s hard to miss. It’s part of the “We Will Be Reborn” candle altar as you make your from the train station into the park.
Audio Diary #2 – “The Old Sheepdog”
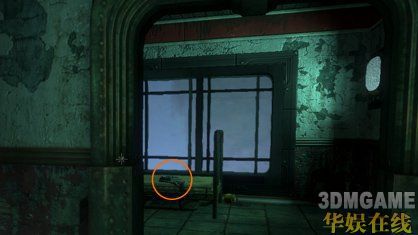
In the security basement, immediately before you remote hack through a broken window to gain access to the park ticket.
Audio Diary #3 – “Volunteer”
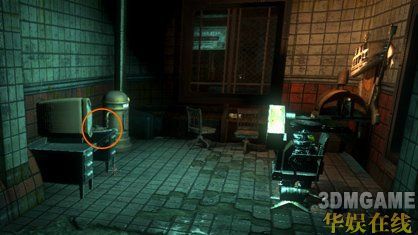
The middle of the Rapture Museum, beneath a bench that is directly between the doors to the Gift Shop and to the Hall of Future.
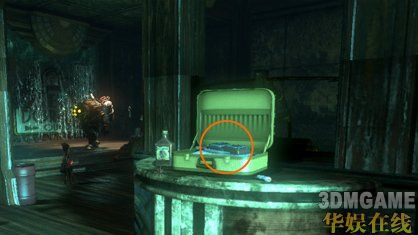
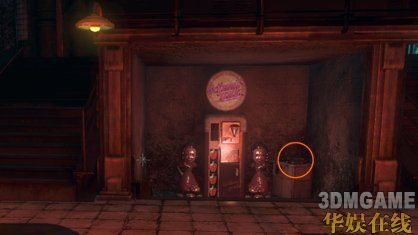
Audio Diary #4 – “Eat Dog”
Can’t miss this one. It’s in the same gift wagon as the Drill Power tonic Eleanor leaves for you.
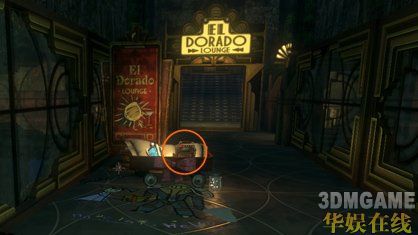
Audio Diary #5 – “’Child’ and Guardian”
Located near the far windows of the El Dorado Lounge, where you fight your first Big Daddy.
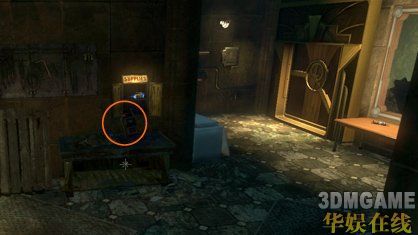
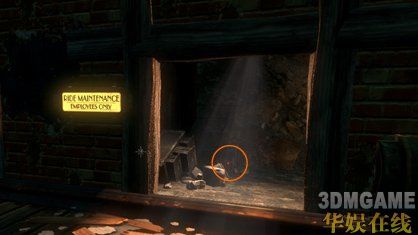
Audio Diary #6 – “You, Me, and 1959”
Before entering the Journey to the Surface ride, head to the Ride Maintenance room on the left for this audio diary.
Audio Diary #7 – “Escape Plan”
On floor next to the second harvest corpse.
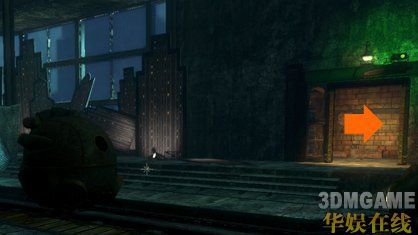
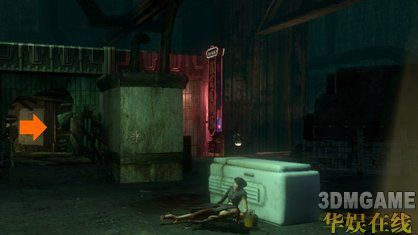
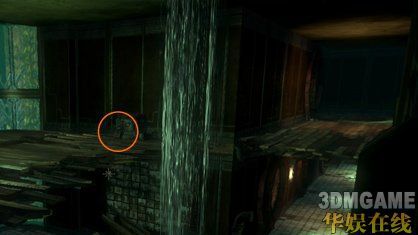
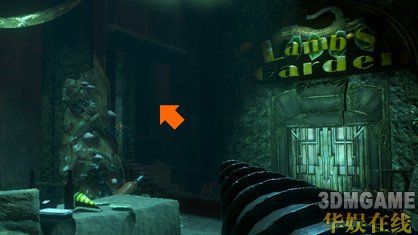
Audio Diary #8 – “Lamb the Problem, Sinclair the Solution”
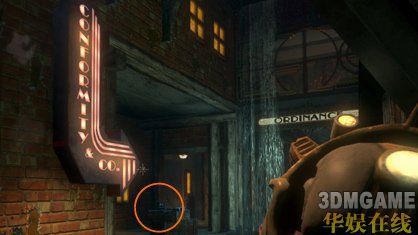
Across from the last audio diary is a pile of crates with an Eve Hypo, .50 Caliber Rounds and another audio diary. It’s right behind some falling water, and also near a large neon arrow sign that says “Conformity & Co.”
Audio Diary #9 – “Truth is in the Body”
This one’s well hidden. Near “Chaos Corner” and just a bit before the second Andrew Ryan robot is a stairway leading to a series of balconies overlooking the track. Diary is on a workbench between two of those balconies. If you reach the Scientist and Artist animatronic dioramas, you’ve passed the staircase and should go back.
Audio Diary #10 – “Deterioration”
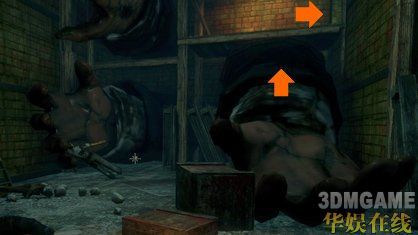
To the right of the animatronic scene with the parents and child is a storage room full of giant hands. Climb the one in the center as if it were a ramp and you’ll find the audio diary on an upper balcony. (Thanks to reader “EngieIndeed”)
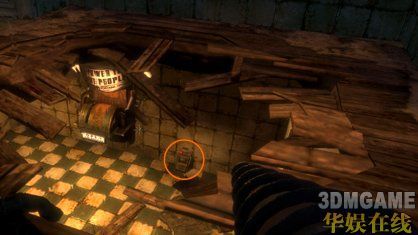
Audio Diary #11 – “Working for Sinclair”
Past the animatronic scene with the parents and child watching television is a water-filled room with a Power to the People weapon upgrade station. In a room to the right is an ammunition vending machine and the audio diary.
Audio Diary #12 – “Doctor Lamb”
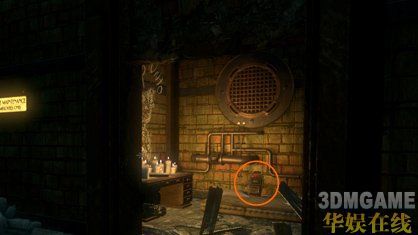
Near the end of Journey to the Surface, under a security camera, is a Ride Maintenance passage with a Bot Shutdown panel. Continue in here and to the left to find a door covered in wooden boards. Break the boards with melee to reveal a hidden room with the audio diary.
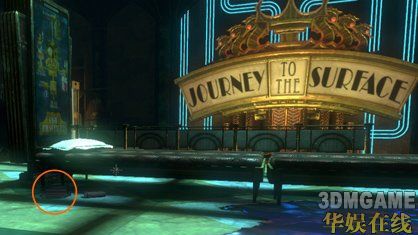
Audio Diary #13 – “Efficacy”
At the end of Journey to the Surface is a miniature lighthouse scene. The door to your left holds a pile of rubble and an audio diary.
Audio Diary #14 – “Dating Tip”
You might have noticed this door before entering Journey to the Surface. Once you’ve opened / unlocked all maintenance doors in order to exit Journey to the Surface, this door will finally open. Head inside for the audio diary.
Audio Diary #15 – “A Father’s Love”
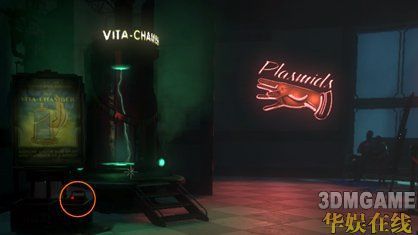
Halfway through the Hall of the Future, next to a Vita-Chamber.
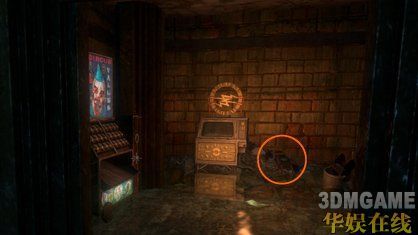
Audio Diary #16 – “Cutting Corners”
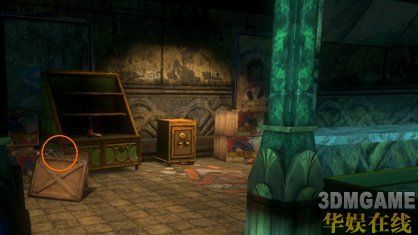
Back of the Gift Shop, near a safe.
Audio Diary #17 – “Rapture is Deliverance”
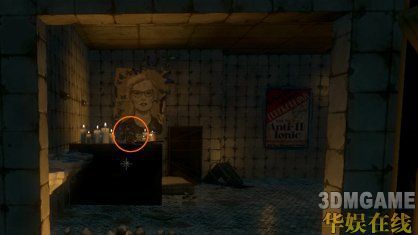
Restroom of the Gift Shop… “Dames” side. You have to Electro Shock the locked door to enter.
Audio Diary #18 – “Disappeared”
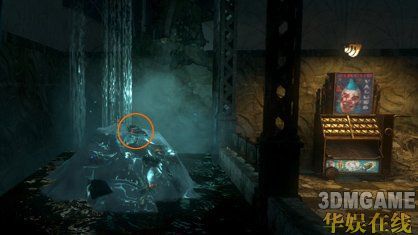
Trapped in ice near the beginning of the level. Once you have the Incinerate plasmid, you can melt the ice and get it.
Audio Diary #19 – “Wooden Nickels”
When Sinclair boards the train, you’ll be attacked by a Splicer swarm. Finish them off, then look for a newly opened door to the left of the previously frozen door. It was locked when you were here before. Inside is an audio diary – make sure to grab before leaving the level.
PAUPER’S DROP
Audio Diary #1 – “Ryan vs Lamb: Religious Rights”
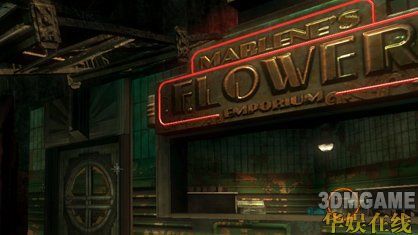
Inside Marlene’s Flower Emporium.
Audio Diary #2 – “Better Times with Lamb”
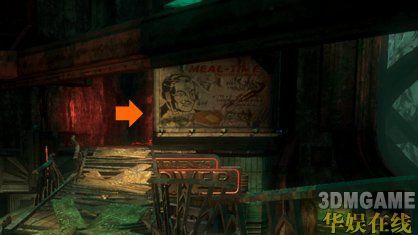
On the ceiling of Marlene’s Flower Emporium. Access this area by climbing the wooden ramp at the back of the Fishbowl Diner, then crossing the roof and another wooden ramp.
Audio Diary #3 – “Wrong Side of the Tracks”
The front office of the Sinclair Deluxe. You can collect this audio diary before clearing the Brute Splicer’s debris.
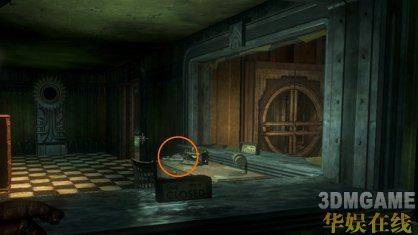
Audio Diary #4 – “The End of the Line”
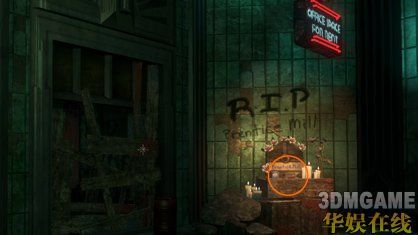
At the makeshift altar to Prentice Mills, in the corner of the large Downtown area with the upended train car.
Audio Diary #5 – “Clinic Code at the Fishbowl”
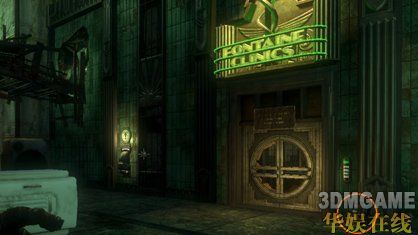
Sitting right outside the door to Fontaine Clinics, below the code input.
Audio Diary #6 – “Camera in Hock”
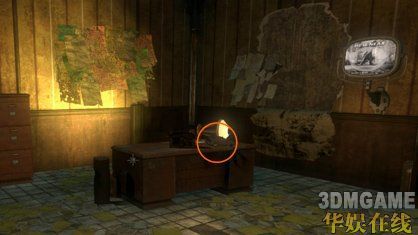
On the desk of R. Flanagan. His office is on the second floor of the Hamilton.
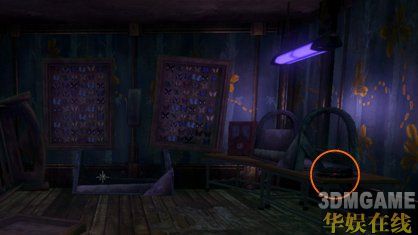
Audio Diary #7 – “Arrangements”
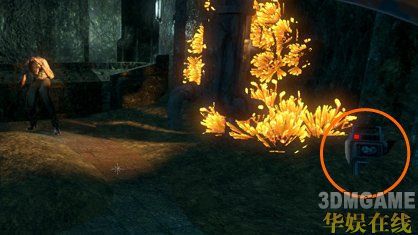
After exiting the top floor of the Hamilton, on your way to the Pawn Shop, you will encounter another Little Sister altar full of blue butterflies. The audio diary is there.
Audio Diary #8 – “Therapy With Grace 1”
Before dropping through the hole in the roof of the Pawn Shop to get the research camera, cross the wooden walkway to the Luxury Rooms. An audio diary is here.
Audio Diary #9 – “Blood and Lamb”

Go to the “Books” store in the Skid Row section of the level. The door will be locked until you access and hack through a hole in the back of the neighboring Pharmacy.
Audio Diary #10 – “Mole”
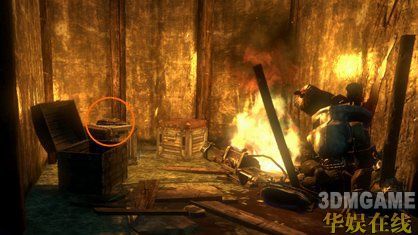
The Skid Row section of this level has a hallway connecting the Pharmacy and Books area to the Limbo Room area with the researchable Brute Splicer. In the middle of the hallway, with a dead Big Daddy and a bunch of fire, is this audio diary.
Audio Diary #11 – “Sunday Services”
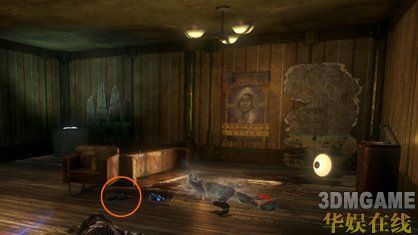
Next to the harvest corpse in the upper apartments of Skid Row. Same room as a record player and Tonic.
Audio Diary #12 – “Pauper’s Drop”
In a hidden room off the roof of the Pharmacy. Get there by taking a wooden walkway from the Skid Row apartments where you got the last audio diary.
Audio Diary #13 – “Closing the Limbo Room”

Grace’s dressing room in the Limbo Room.
Audio Diary #14 – “A Gift From Lamb”
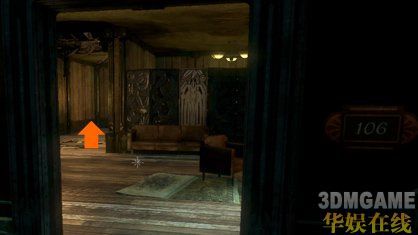
Bathroom at the back of Room 106, which is on the first landing (second floor) of the Sinclair Deluxe. Go here before heading down the long, dark hallway.
Audio Diary #15 – “Profit Coming, Profit Going”
Before moving to the second landing (third floor) of the Sinclair Deluxe via a collapsed floor ramp, head right and go up some stairs. You’ll find yourself above the room with the sacrificial corpse and Little Sister vent. Jump across to grab the audio diary.
Audio Diary #16 – “Where Has Harry Gone?”
An apartment room with a safe and turret, on the second landing (third floor) of the Sinclair Deluxe.
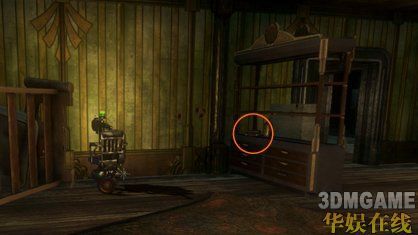
Audio Diary #17 – “The Butterfly”
Right before climbing to the third landing (fourth floor), you should notice this blue-hued butterfly room. The audio diary is inside.
Audio Diary #18 – “What A Snap”
On the third landing (fourth floor) balcony. Opposite end as Grace’s apartment door.
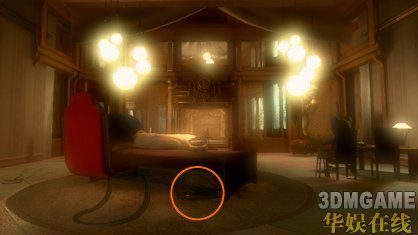
Audio Diary #19 – “Barbarism”
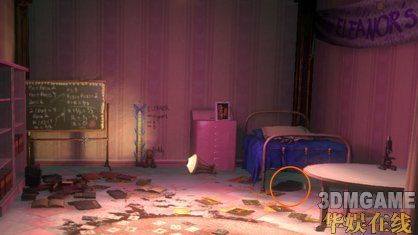
Tucked under Eleanor’s bed in Grace’s apartment.
Audio Diary #20 – “Failing Lamb”
Lying on Grace’s bed in her apartment.
Audio Diary #21 – “Field Trial #1”
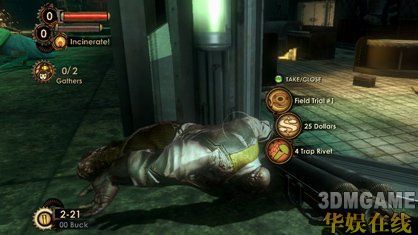
While escaping Pauper’s Drop after dealing with Grace, kill the Brute Splicer you encounter in the Fishbowl Diner area. Search his corpse for an audio diary.
SIREN ALLEY
Audio Diary #1 – “A Silent God”
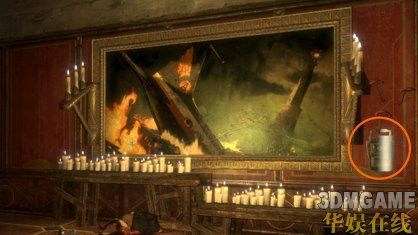
Hanging next to the painting of the first BioShock’s plane crash. On your left as you enter Little Eden Plaza from the airlock.
Audio Diary #2 – “Misbehaving”
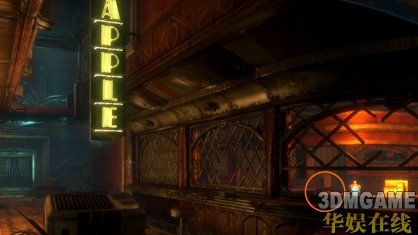
The counter of the Poisoned Apple bar in Little Eden Plaza. To get inside, you must climb up any of the nearby staircases and drop through the roof.
Audio Diary #3 – “The Rumbler”
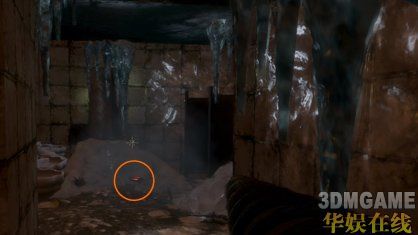
Inside the restroom of the Mermaid Lounge, under a mound of frozen ice.
Audio Diary #4 – “Plasmid Shipment”
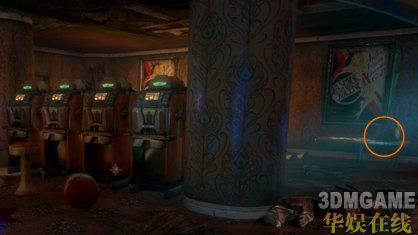
On a table in the slot machine room. Upper floor of Mermaid Lounge.
Audio Diary #5 – “Farther to Fall”
Right next to the Mermaid Lounge’s weapon upgrade (Power to the People) station. To access, go upstairs, shoot a hack dart through the bar window to unlock the door and drop through the hole in the floor.
Audio Diary #6 – “’Father Simon Wales’”
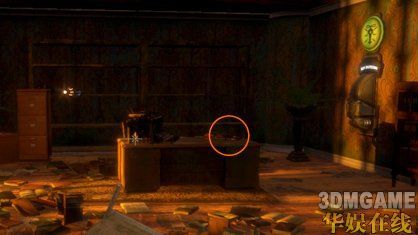
In an office on the first floor of the Pink Pearl brothel.
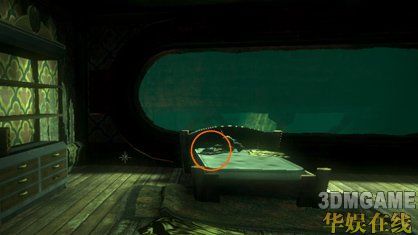
Audio Diary #7 – “Double Standard”
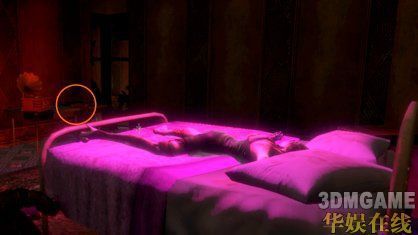
Second floor of the Pink Pearl, in the central room with the bed, dead hooker and purple flickering light.
Audio Diary #8 – “Wales ‘an Wales”
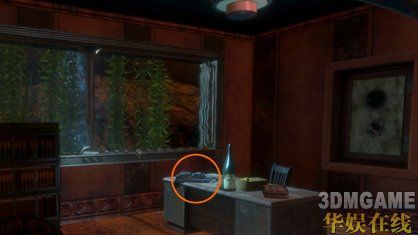
Daniel Wales’s desk on the highest floor of the Pink Pearl. His office is next to the hole in the floor that Daniel drops through.
Audio Diary #9 – “The Date is the Code”
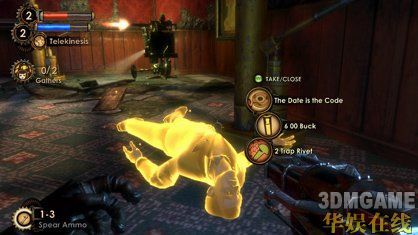
Search Daniel Wales’s corpse after defeating him.
Audio Diary #10 – “Lamb’s Salvation”
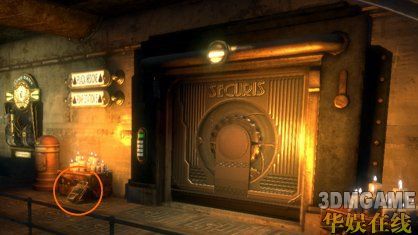
Outside the entrance to Plaza Hedone, propped next to the door you’ve spent the first half of this level trying to open.
Audio Diary #11 – “The Pair Bond Mechanism”
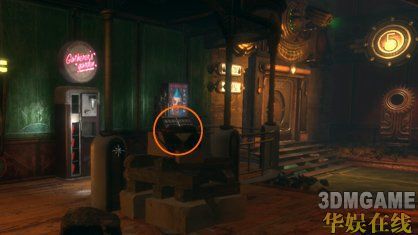
In Plaza Hedone, the second shopping center of Siren Alley. Near the door to the Little Sisters Orphanage, as well as a Gatherer’s Garden and security camera.
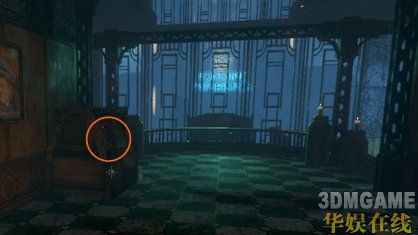
Audio Diary #12 – “Bury Her Memory”
Second level of Plaza Hedone, in a northwestern room with a desk and a fridge.
Audio Diary #13 – “The Requirements of Utopia”
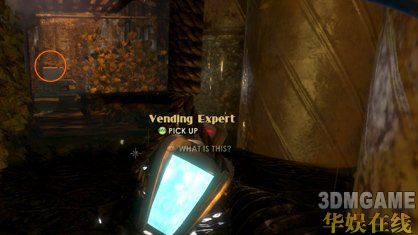
In the southwest, ground-level corner of Plaza Hedone are two small alleys that meet in a loop. One side of this loop drops down to a watery sewer with a Vending Expert tonic hanging from a noose… and the audio diary right after that.
Audio Diary #14 – “An Empty Niche”
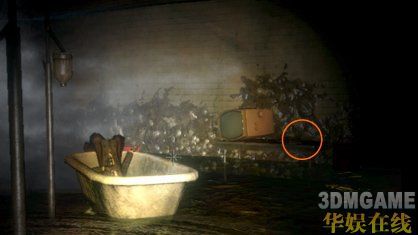
Find the illegal plasmid lab by hitting the “conspicuous switch” at the Green Grocery. At the very back of this area, in a dark room with dead bodies in bathtubs, you’ll find the audio diary on a table.
Audio Diary #15 – “Lamb’s Operation”
Located in the smugglers’ hideout, which is above the Green Grocery, past a turret and through a steel door. Most any walkway on the 2nd or 3rd levels of Plaza Hedone will lead you to this area eventually.
Audio Diary #16 – “My Name is Eleanor”
Last bunk bed in the group sleeping quarters of the Little Sisters Orphanage.
Audio Diary #17 – “Shackled to the Great Chain”

Enter the first part of Pump Control Substation #5. On the upper level, in the northwestern corner, is a locked office. Hack the door through the grate and grab the audio diary.
Audio Diary #18 – “Guidance of Lamb”
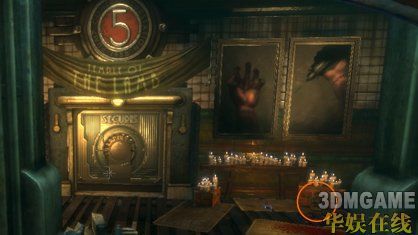
At the candle altar, before heading into the “Temple of Lamb.” It’s underneath the paintings of the first BioShock protagonist’s hands.
Audio Diary #19 – “Therapy with Grace 2”
In the last hallway before Father Wales’s church, there’s a door on your left leading to Sofia Lamb’s office and a Power to the People weapon upgrade station. The audio diary is tucked in a filing cabinet.
Audio Diary #20 – “The Creed of the Faithful”
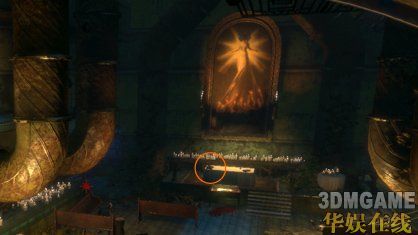
At the main altar of Father Wales’s church, beneath the large painting of the butterfly-headed woman. Grab before the place floods.
DIONYSUS PARK
Audio Diary #1 – “Patronage”
Fight the first Houdini Splicer in the large room with the covered statues. East of that room, in the area that leads to the exit staircase, is the audio diary.
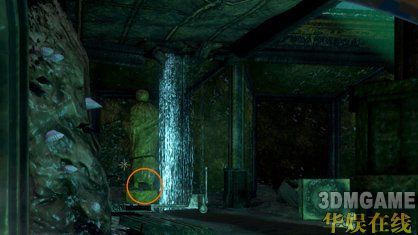
Audio Diary #2 – “A Gift From Billy”

Climb up the stairs to exit the first big room with the covered statues and Houdini Splicer encounter. Before leaving through the door here, however, continue back down the stairs on the other side. This way ends with rubble, but also the most unlistenable audio diary in the game.
Audio Diary #3 – “Lamb’s Time is Over”
When you use Billy’s code to unlock the door above, you’ll find a rose (aww), a weapon upgrade station and another audio diary.
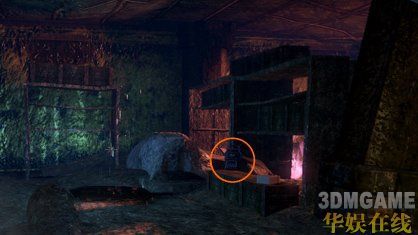
Audio Diary #4 – “Lamb’s Idea of Art”
In the room after climbing a frozen stairwell, but before reaching the carousel. Some Splicers will be arguing over a ruined vending machine. The audio diary is at the feet of one of the statues.
Audio Diary #5 – “Lost and Found”
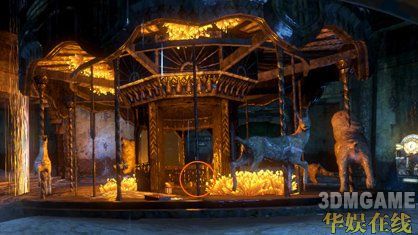
Center of the carousel.
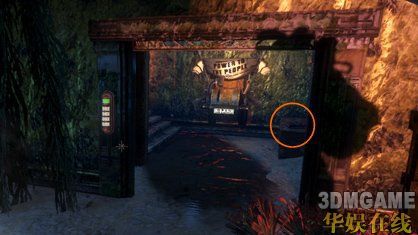
Audio Diary #6 – “Lamb Flouts the System”
In the arched promenade that connects the three artistic areas. The audio diary is near the central statue, tucked under a fallen trash can.
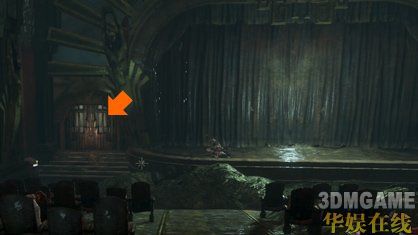
Audio Diary #7 – “Learning Poker”
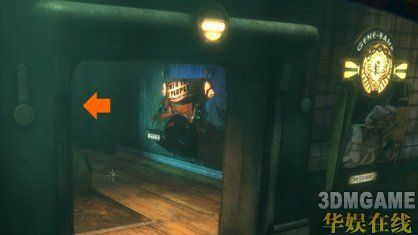
Head to the Triton Theater, then to the basement lounge. At the back, through a locked door that you must hack open, is this audio diary.
Audio Diary #8 – “Growing Up”
In the Triton Theater, follow signs up to the Projection Booth. Across from the booth room’s door is a pile of rubble with the audio diary.
Audio Diary #9 – “A Spy”
The edge of the theater balcony.
Audio Diary #10 – “A Secular Saint”
Go through the door to the left of the theater screen. The audio diary is at the end of the hallway.
Audio Diary #11 – “The Voice of the Self”
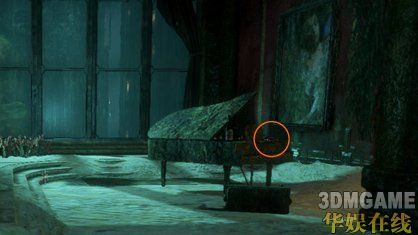
On the piano in the Piano Bar.
Audio Diary #12 – “Falling Into Place”
Inside the frozen Imago Gallery, near the Little Sister vent in the back. You’ll have to thaw some ice to grab the audio diary.
Audio Diary #13 – “Gotta Keep It Together”
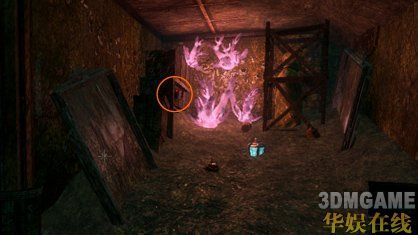
Back of the J. Fischer Gallery, next to the Drill Specialist tonic.
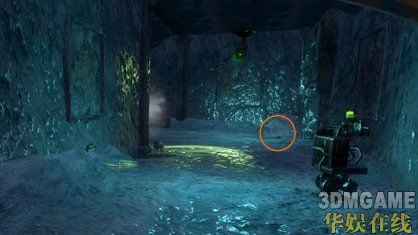
Audio Diary #14 – “Dionysus Park’s Weakness”
In the first room of Basement Storage. Climb up the short stairs on either side and you’ll find the audio diary propped against a flooding door.
Audio Diary #15 – “A Plan”
At the very end of the level, in the newly opened security booth with Stanley Poole.
FONTAINE FUTURISTICS
Audio Diary #1 – “Alone at Last”
Walk through the first door of this level and the audio diary is immediately to your left.
Audio Diary #2 – “Agnus Dei”
Pretty sure you won’t miss this one. It’s the password from Gil Alexander that you use to progress through the level.
Audio Diary #3 – “Means of Control”
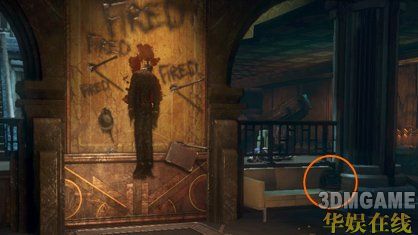
After “Alex the Great” prevents you from accessing the security office, a door will open behind you leading to the rest of the level. The audio diary is on a couch immediately upon entering this door, to the right of the “Fired” corpse hanging from the wall.
Audio Diary #4 – “Prototype”
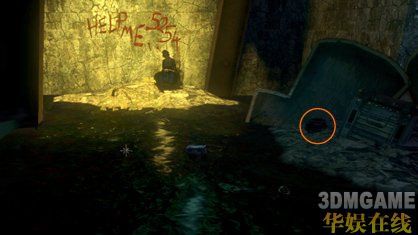
When you’re first entering the Plasmid Showroom (Fontaine’s Plasmid Spectacular Theatre), you can look through a hole in the wall and see a corpse tied to a chair with a code written in blood. Access that area and you’ll find the audio diary.
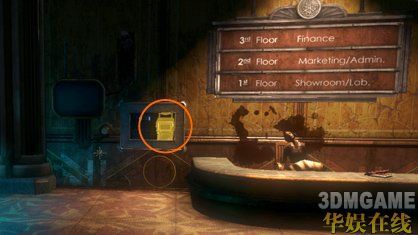
Audio Diary #5 – “Life After Sisterhood”
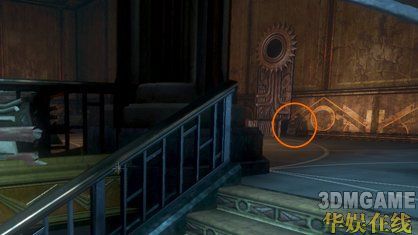
On the second floor of Fontaine Futuristics Tower. You’ll notice it next to the Little Sister vent as soon as you climb the central stairs.
Audio Diary #6 – “A New Cognitive Model”
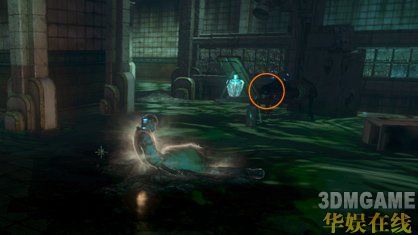
In the Plasmid Presentation Room with the voice recording of the doctor talking to the patient. To get inside, go to the second floor and look for a hole torn in the wall. Crawl through, follow the passage and drop into the presentation room.
Audio Diary #7 – “Source of Volunteers”
Head to the Marketing Department of Fontaine Futuristics – the area with the Splicer board meeting that comes to life. The room to the left of this area is flooded with electrified water. The audio diary is on one of the submerged desks.
Audio Diary #8 – “Goodbye to Fontaine”
Inside the Office of Frank Fontaine. Turn the boar head to reveal a hidden safe, as well as this audio diary.
Audio Diary #9 – “Abort the Experiment”

After shutting down security and entering the Plasmid Laboratory, this table with an audio diary and Big Daddy helmet will be immediately upon your left. If you enter another underwater section, you’ve gone too far.
Audio Diary #10 – “Solving for X”
Under one of the circuit breakers you use to restore power in Gil Alexander’s giant tank room.
Audio Diary #11 – “Gil’s Place in the Plan”
Next to the Gatherer’s Garden in Gil Alexander’s giant tank room.
Audio Diary #12 – “Outlived Usefulness”
“Pacification Chamber” side of the laboratory. On the control deck of the observation room.
Audio Diary #13 – “Goodbye, Dr. Alexander”
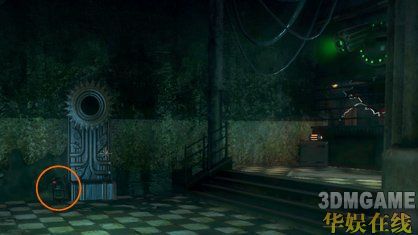
“Holding Cells” side of the laboratory. Below one of the Little Sister vents… on your map, it’s the left vent in this area.
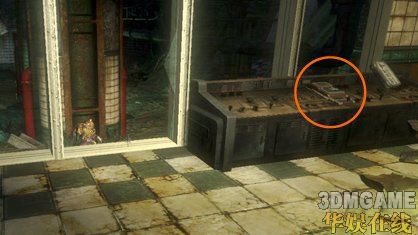
Audio Diary #14 – “Big Sister”
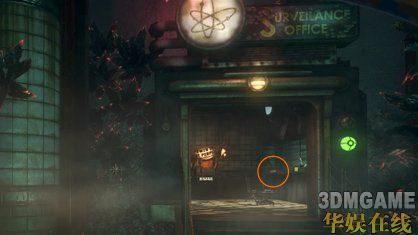
“Holding Cells” side of the laboratory. Next to the Power to the People weapon upgrade station in the locked Surveillance Office.
Audio Diary #15 – “Betrayal”
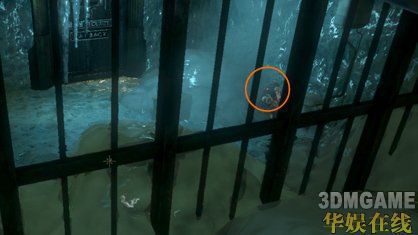
“Holding Cells” side of the laboratory. Below your feet in the Live Test Facility is a hallway full of prison cells. The northwestern cell (when looking at the map) contains the audio diary, but is also frozen shut. Go through the back of the northeastern cell and Incinerate the ice through the bars.
Audio Diary #16 – “Meltzer’s Choice”

“Holding Cells” side of the laboratory. When you kill the Big Daddy in this area, make sure to search his corpse carefully. There’s an audio diary with a nasty surprise.
Audio Diary #17 – “The People’s Daughter”
Use the genetic key at the Oxy-Fill station to open the entrance to Lamb’s hideout. The audio diary is in the hallway leading to the level-ending elevator.
PERSEPHONE OUTER
(Note: These audio diaries are categorized under “Lamb” in the Messages section of your menu.)
Audio Diary #1 – “Selling Ryan Short”
Before reaching the Control Room with Eleanor’s cell, you’ll pass by a couple of examination rooms with banks of television monitors facing chairs. The audio diary is near the Little Sister vent here. You’ll wake up in this room later, so don’t worry if you miss it at first.
Audio Diary #2 – “Withholding Visitation”
After you pull the lever in Sofia Lamb’s office, continue down the hallway past the bookshelves. The audio diary is sitting on this chair at this desk. If you start climbing a long set of stairs, you’ve gone too far.
Audio Diary #3 – “Blessing in Disguise”
In a toy submarine to the left of the red Dr. Alexander statue.
Audio Diary #4 – “Behind Mother’s Back”
On the same desk as the Big Sister helmet you acquire for Eleanor.
Audio Diary #5 – “Freeing Father”
Check behind Eleanor’s bed when you’re bringing her the three pieces of the Big Sister suit. Do so before giving her the pieces.
INNER PERSEPHONE
(Note: These diaries are categorized under “Persephone” in the Messages section of your menu.)
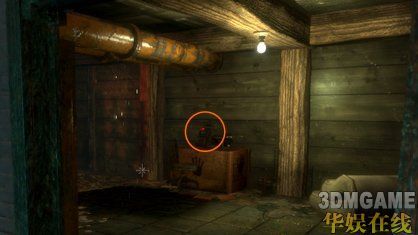
Audio Diary #1 – “Out With the Old…”
In the same room (Security Checkpoint A) as the panel you hacked through a broken window. Once you’ve unlocked the doors, just make sure to circle back around to this area through the glass tunnels before hitting the Prisoner Admittance Button.
Audio Diary #2 – “The Definition of Despair”
One of the cafeteria tables near the window.
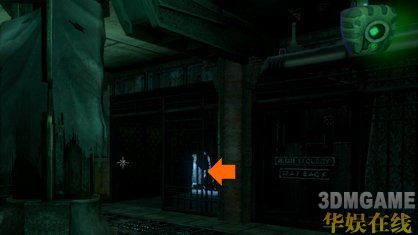
Audio Diary #3 – “First Two Digits”
The next six audio diaries are located in the Holding area where you fight Sinclair. This one is on the upper level, in a Cell Block D toilet.
Audio Diary #4 – “A Trade”
Also in Cell Block D. This time, in the cell next to the turret.
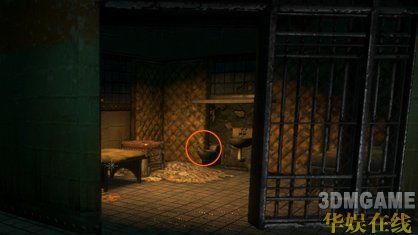
Audio Diary #5 – “No More Hope Left”
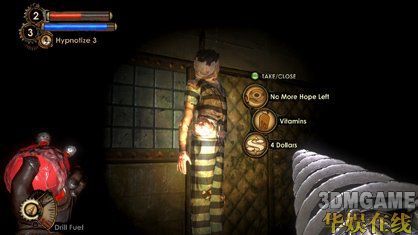
Search the hanging corpse in Cell Block B, which is only accessible through a hole in the wall of Cell Block C.
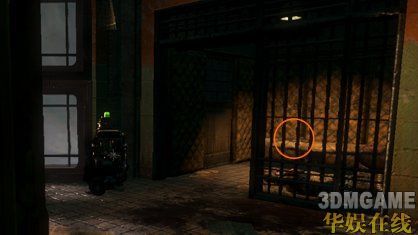
Audio Diary #6 – “A Generous Offer”
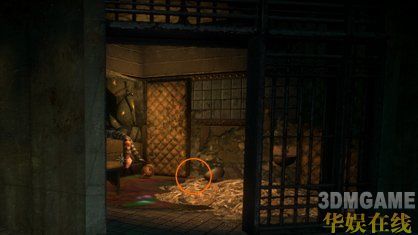
In Block A, first cell on the left as you enter. There’s a corpse stuck in a wall hole.
Audio Diary #7 – “Last Two Digits”
Lower level of the Holding / Sinclair area. Follow the signs to Cell Block South Quad and look for the dark cell in the corner. The audio diary is through the glowing hole.
Audio Diary #8 – “Magic Sauce”
Inside the locked security tower with Sinclair.
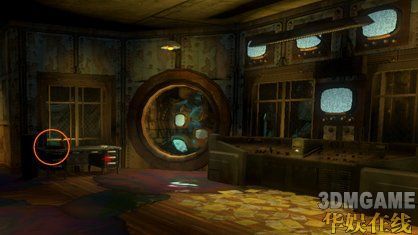
Audio Diary #9 – “A Simple Question”
The next four audio diaries are located in the Therapy section of Persephone. This one is in the Intensive Therapy room, near all the electric chairs.
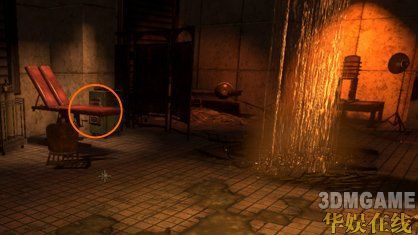
Audio Diary #10 – “Destructive Learning”
Also in the Therapy section. Before heading down the hall to the Pediatric Ward, check the door you see above, surrounded by falling water. The audio diary is inside.
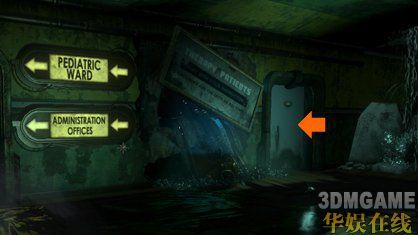
Audio Diary #11 – “Sacrifices”
Also in the Therapy section. Follow the signs to the Administration Office and, once there, go through the first door you see to find this room full of white cabinetry.
Audio Diary #12 – “A Stratagem for Sinclair”
Also in the Therapy section, on the bottom floor of the Administration Offices. Look left of all the Pneumo mail tubes.
Audio Diary #13 – “Such Freedom”
The final four audio diaries are located in the Infirmary section of Persephone. To grab this one, follow the signs to Ward A. You’ll pass through a long hallway with hospital room doors on either side. The last room on the left, next to the window, holds the audio diary.
Audio Diary #14 – “My Prison”
The Quarantine Area of the Infirmary. The audio diary is in the same room as the Power to the People weapon upgrade station. To get the door open, look for a switch on a column… but beware, hitting the switch will release two Alphas from their padded cells.
Audio Diary #15 – “They Feel Pain”
The Surgery section of the Infirmary. Located in the dark room with all of the bizarre X-rays on the wall.
Audio Diary #16 – “Alleviating Pain”
The Autopsy section of the Infirmary. On a draining table in the middle of the dark room, behind the hanging doctor corpse.
Feb 10, 2010